Thursday, June 20, 2019

Axle creak

After each of the last two front tire changes, a creak developed that correlated with throttle movement (but not braking).  The creak was caused by torque-transfer from the motor.

To eliminate the creak, it was necessary to make the left axle nut (which presses on a torque-transfer washer) very tight (33 lb ft?).  Given how little material cross-section is in the axle at the left side where the electrical cable comes out, there may be danger of the axle snapping off.  Is there a recommended tightening-torque for the axle nuts?

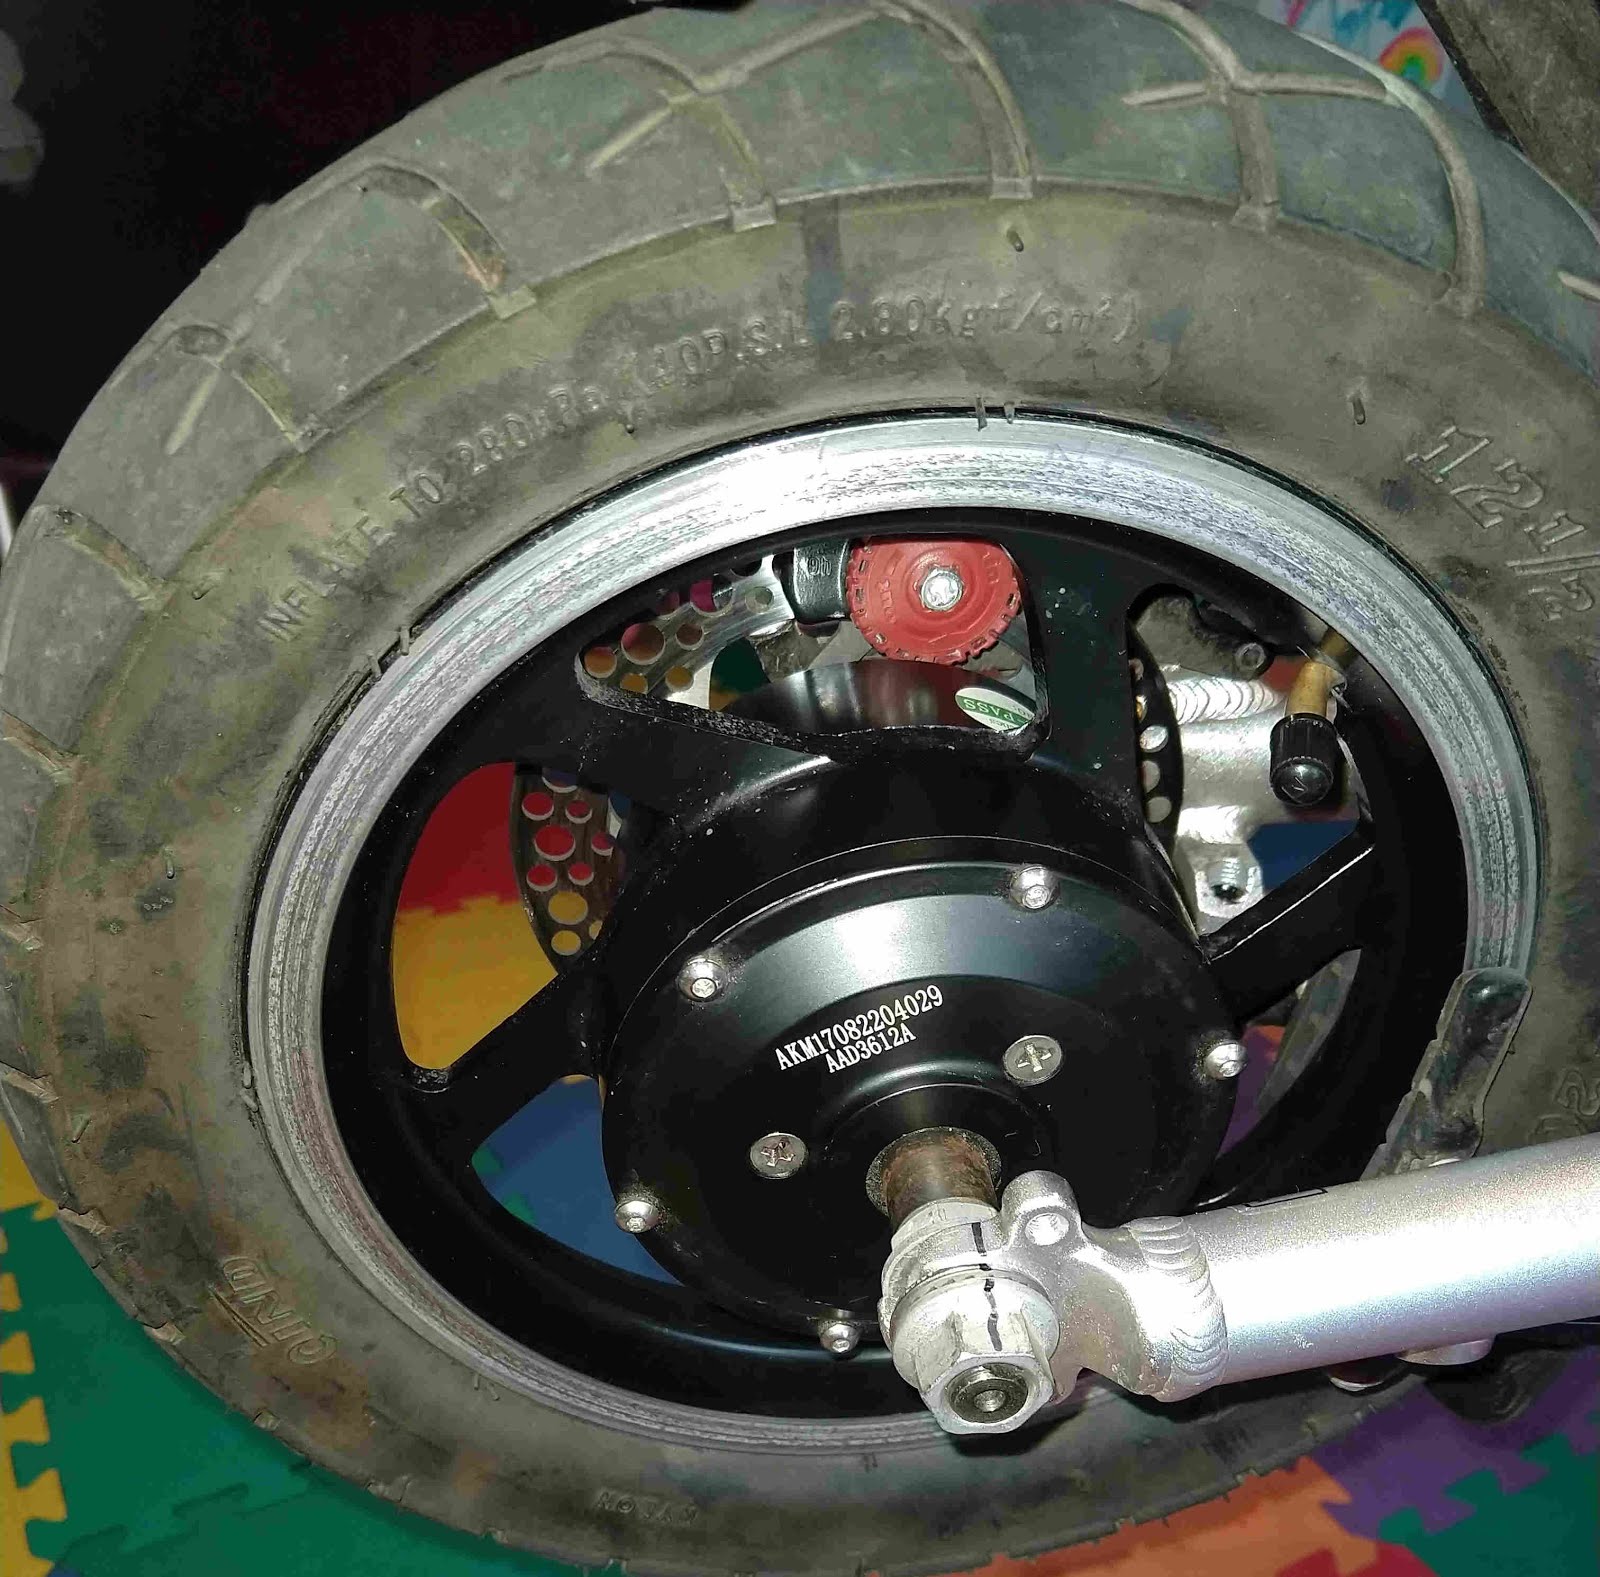
Closer inspection of the torque transfer washer shows (see picture) that it contacts the fork dropout slot on one side but not the other.  Presumably, the use of motor braking causes the torque direction to switch, and the transfer washer rotates to contact at the other side.  After many cycles of back-and-forth torque transfer, the axle nut gets loose, and a creak develops.  

As others have discussed:
"Regen braking can slowly loosen the axle".
See also this and this thread.  They suggest using thread locker (Loctite 242) and adding washers that allow rotation between the nut and torque arm (in this case torque washer).

No fit is perfect, and the axle will have some rotation with respect to the torque transfer device. But the axle shouldn't rotate with respect to the nut, or the nut will get loose. So there needs to be differential rotation between the nut and torque washer.

To favor desired rotation (axle and nut rotate together with respect to torque washer) over undesired rotation (axle rotates with respect to torque washer and nut), we want more friction between the nut and axle (thread locker) and less friction between the nut and torque washer (add lubricated plate washers).


8/31/2019 Update:  400 km ago, I added a smooth washer between the right axle nut and dropout, and also applied Loctite 243 to that thread.  The left axle nut is tight but has no extra washer or Loctite.  The axle creak, which was coming back every 100 km or so, has stayed away.

5/13/2020 Update:  600 km after the 8/31/2019 update, I noticed that both left and right axle nuts were very loose.  The loosening and creaking problem is unsolved.  Now I am re-torquing the nuts every 150 km or so.  A new motor controller might be easier on the axle and nuts.

Fall, 2022:  After over 3000 km on the smooth new motor controller, the axle has stayed tight despite heavy regen-breaking.  For the previous loosening, I blame the re-synchronization jerk of the original controller when engaging the throttle after coast.  Despite its briefness, this always felt like the most violent part of the ride.  It stands to reason that the repeated torque impulses (about one per km) gradually loosened the axle.

Tuesday, June 18, 2019

Tire change #3 and #4

The previous Goodyear "Street" tire was showing cords after only 369 km (229 miles).  I replaced it with a heavy-duty "electric scooter" tire (QIND Q-211).  The scooter tire is a lot beefier, but the nominal size is the same, 57-203.
Initial inflation to 25 PSI caused a little tire rub (probably at the "hairs" that hang off).  Lowering the pressure to 10 PSI reduced rubbing.  Low tire pressure makes the contact patch wider, so more rubber is available to wear.  It also improves shock absorption, but raises rolling resistance (not so important) and the risk of bottoming-out (which is hard to quantify).  The operating weight of the front wheel is only 40-60 lb1 (measured with a bathroom scale) and I approach large bumps slowly, so I think low pressure is ok.
This tire was super tight to put on.  I used 12" motorcycle tire levers and also zip ties to hold the seated bead against the rim while working the tire on.
For unknown reasons, after the tire change I had to adjust the V-brake left and right spring tensions a lot to prevent brake drag.
I recommend this tire for anyone who wears out multiple tires per year and is willing to deal with a tight bead and minimal clearance.
Update: The Q-211 tire lasted 3620 km.  It ended with a gradual flat (first one) and some cords visible.  I had periodically pumped it to 20 psi or so.  At softer, more comfortable pressure, the tire and tube slowly rotate against the rim because of driving torque.  This would cause the valve stem to rip out.


1 Equals 18 to 27 % of vehicle weight, depending on upper body position. Shifting the wheelchair rear wheels backward would improve the Firefly weight distribution but degrade manual wheelchair handling.

Sunday, June 9, 2019

Door opener

Doors are difficult to operate with the Firefly on the wheelchair, because the attachment makes the wheelchair long.  After fighting with our home's entrance door one time too many, it was time to build an electric door opener.  This door has the peculiarities that:

  1. Gravity pulls it shut.
  2. The door sticks at the frame and does not fall all the way closed after cracking it open.
The opener is activated by Bluetooth remote control buttons.  It uses a motor attached to the wall to pull the door open by winding a string onto a pulley (after unlocking and cracking the door open by hand). Gravity makes the door fall shut when the motor releases the string. 

Main ingredients (total cost under $200) are:
  • Stepper motor (Sparkfun ROB-13656)
    • Pulls the door open
    • Strong enough to open the door, but weak enough to not crush people or things.
  • Motor driver (Sparkfun BOB-13752)
    • Energizes the motor
  • Raspberry Pi Zero W (MicroCenter)
    • Receives Bluetooth signals and generates motion commands
    • Talks to the motor driver via SPI.
  • NEMA23 bracket (Amazon)
    • Attaches the motor to the mounting board
  • Mounting board (Amazon)
    • A spare 10" x 10" wooden pizza peel that was in the drawer
    • Holds circuit boards and motor
  • Pulley / drum (McMaster 6245K214)
    • Let the motor wind string like a winch.
  • String (McMaster 2057T75)
  • D-ring (McMaster 3076T35)
    • Attach string to door
  • Power supply (12 V, 3 A) from unused equipment
  • Jumper wires (MicroCenter)
  • Bluetooth LE buttons
    • Initially "Scosche Tapstick"
    • Later cheap "iTAG" buttons from eBay / China
  • 5 Volt regulator (7805)
    • Power the Raspberry Pi from 12 V supply.
  • Miscellaneous: fasteners, pin headers
Some custom software on the Pi is needed to send appropriate commands to the motor driver, and dispatch these commands after receiving Bluetooth events.  So far, this system has cycled the door 476 times with only the occasional software tweak.